


Add, change or delete an employment
Add a new employment period for an employee, change its weekly hours, and delete a period that was added by mistake.
Before you start
You need:
- Access to My Team (the people icon in the side menu)
- The right to edit employees of your units
- An employee in one of your units
New to the app? Start with Sign in to the web app.
When to use it
When an employee's working hours or duty hours type change from a given date.
Step by step
-
Step 1: Open Employment & job age worked
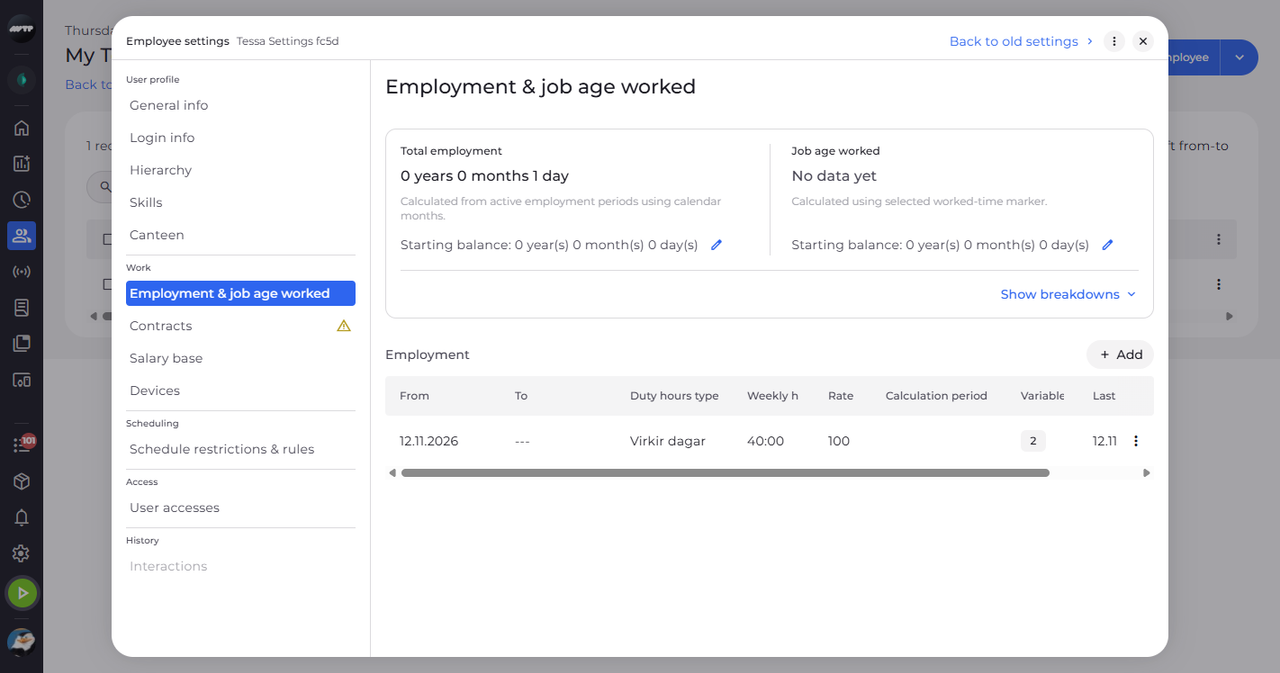
In My Team, click the employee's ⋮ button and choose Edit employee. Then click Employment & job age worked on the left. The cards at the top show Total employment and Job age worked; the employment periods are listed under Employment.
Tip: Click Show breakdowns to see each total month by month.
-
Step 2: Add an employment
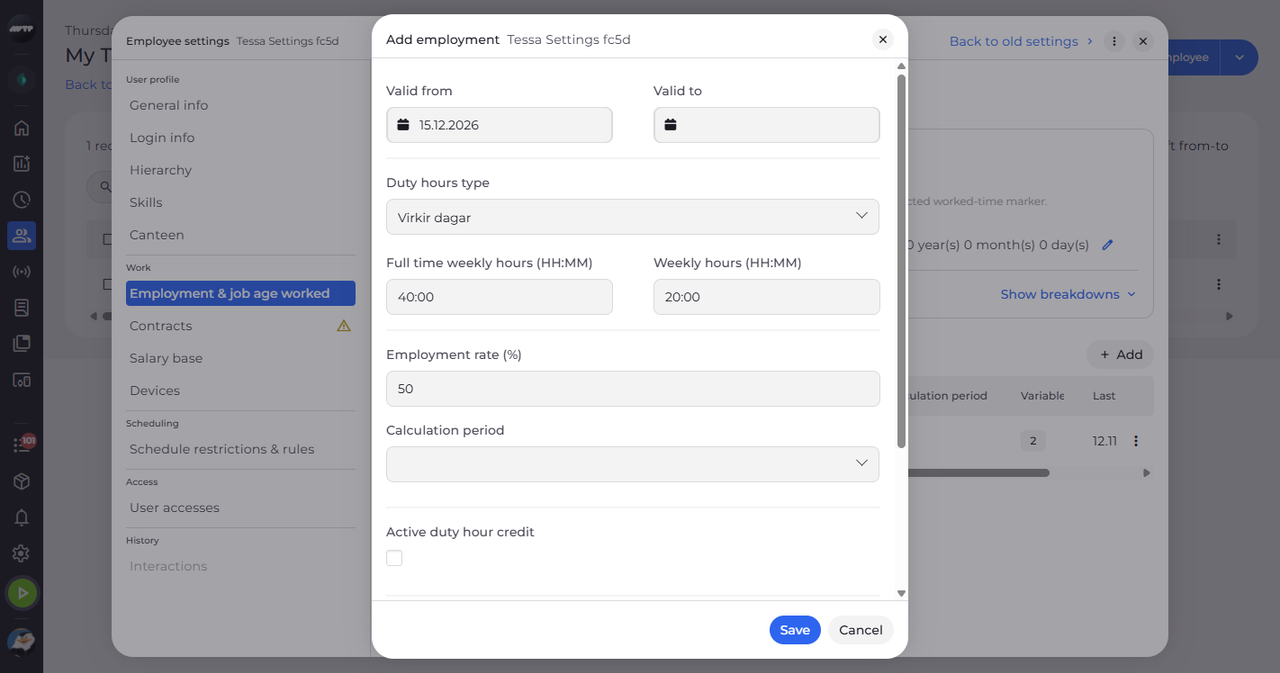
Click Add. In Add employment, set Valid from, choose the Duty hours type and type the Weekly hours (HH:MM). Full time weekly hours (HH:MM) and Employment rate (%) fill in by themselves.
Tip: Valid from, Duty hours type, Full time weekly hours (HH:MM) and Weekly hours (HH:MM) are required. Leave Valid to empty for an employment with no end.
Tip: The Duty hours type fills Full time weekly hours (HH:MM) with its own week, and Employment rate (%) follows the weekly hours - 20:00 of 40:00 is 50.
-
Step 3: Check the new employment
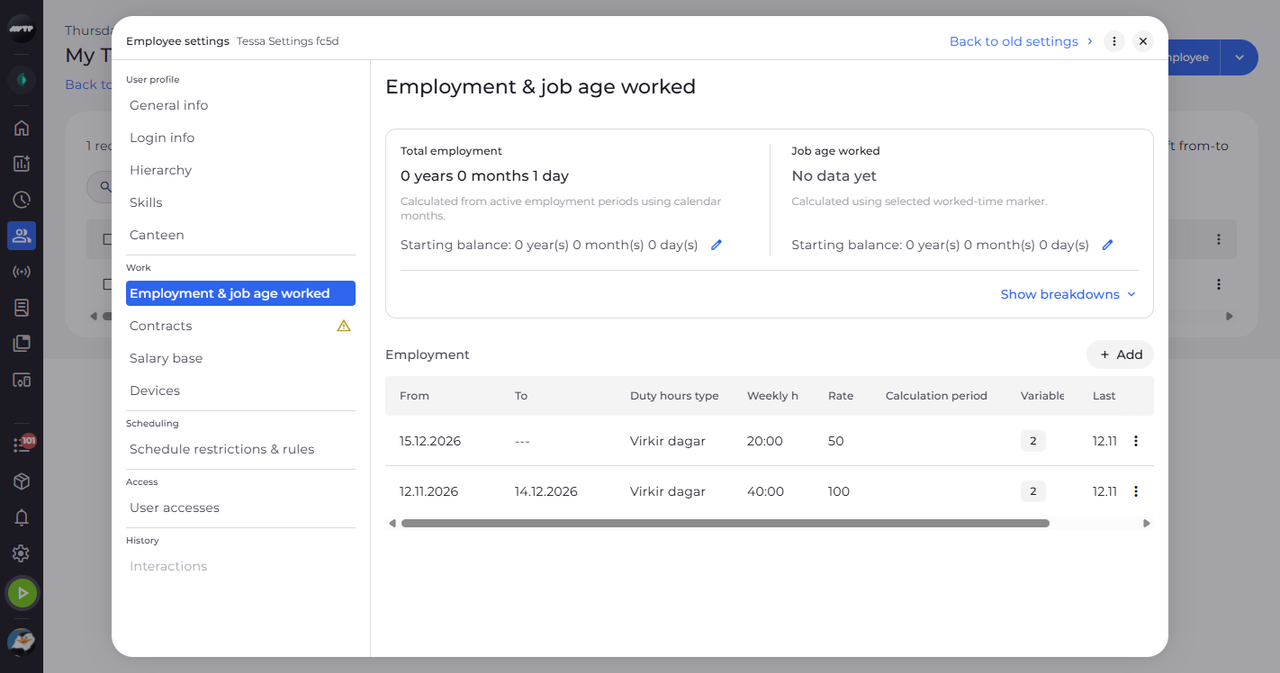
Click Save and answer the notification question. The new period appears at the top of the list, and a message confirms "Employment added". The earlier open-ended period now ends the day before.
Tip: After Save the settings ask "Send a notification about the employment change?" - Yes tells the employee, No saves without telling.
-
Step 4: Change the weekly hours
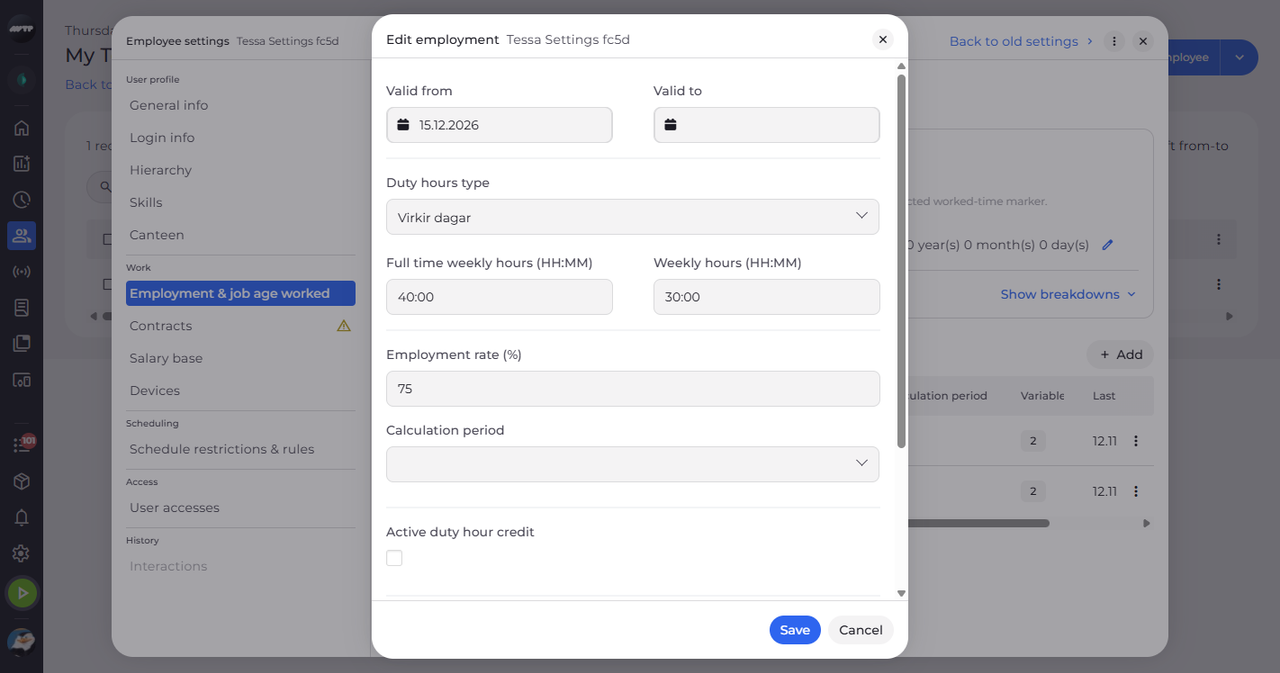
To change a period, click the ⋮ button at the end of its row and choose Edit. In Edit employment, change Weekly hours (HH:MM) - Employment rate (%) follows - and click Save.
Tip: Saving an edit also asks about a notification, then confirms "Employment saved."
-
Step 5: Delete an employment
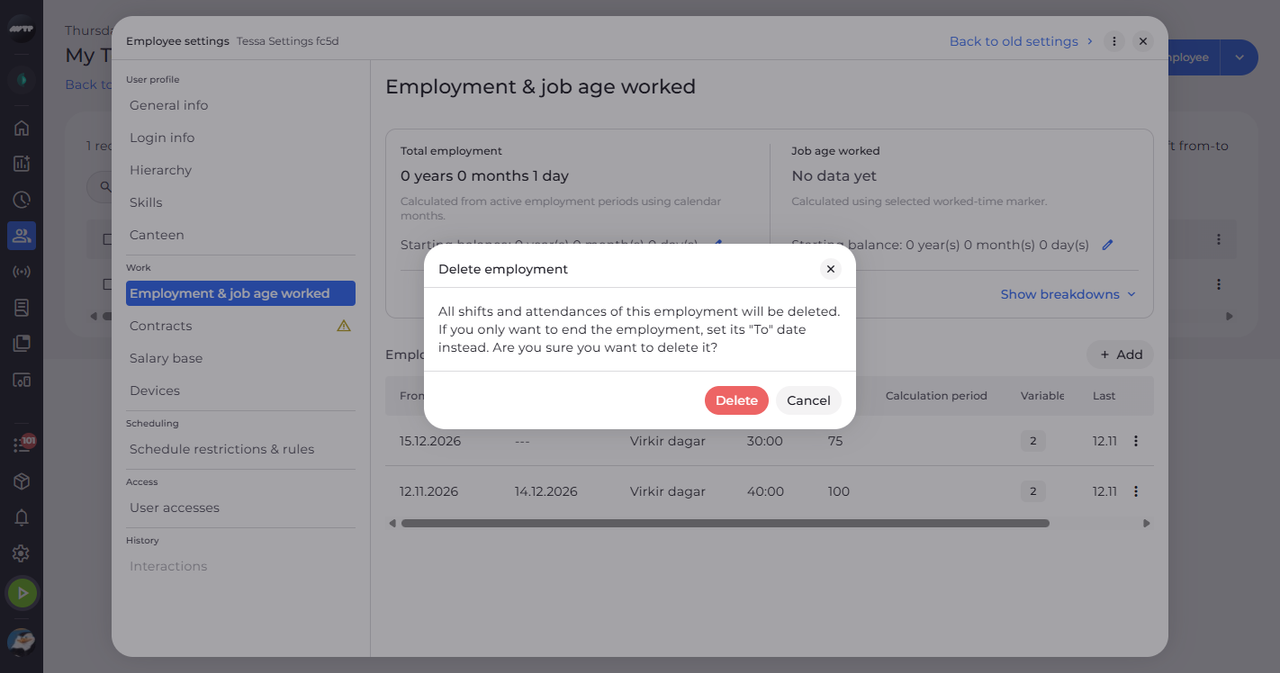
To delete a period, click the ⋮ button at the end of its row and choose Delete. Delete employment warns that the period's shifts and attendances are deleted with it.
Tip: Confirm with Delete; the settings confirm "Employment deleted."
What happens next
The employee's employment periods are up to date.
Good to know
- A new employment ends the employee's open-ended one on the day before it starts. Deleting the new one does not reopen the earlier one - set its Valid to again if needed.
- To only end an employment, set its Valid to date instead of deleting it.
- If an edit moves the start later or the end earlier and shifts or attendances fall outside the new period, Shorten employment asks first: they will be deleted.
- Total employment counts the employment periods in calendar months; Job age worked counts worked time and shows "No data yet" until there is some.
Questions
How do I count time an employee worked before they joined?
Click the pencil next to Starting balance and enter the years, months and days. The balance counts from the start of the first employment.
Why is Save greyed out?
A required field is empty or incomplete - the hour fields need the whole HH:MM value ("Enter the whole HH:MM value."), and Valid to cannot be before Valid from.
Why am I asked to restore shifts?
Ending an earlier employment deleted shifts or attendances that fall into the new period. Yes brings them back.