


Add or remove a canteen
Record which canteen an employee uses and for which period, and remove the canteen when it no longer applies.
Before you start
You need:
- Access to My Team (the people icon in the side menu)
- The right to edit employees of your units
- An employee in one of your units
New to the app? Start with Sign in to the web app.
When to use it
When an employee starts or stops using a canteen.
Step by step
-
Step 1: Open Canteen
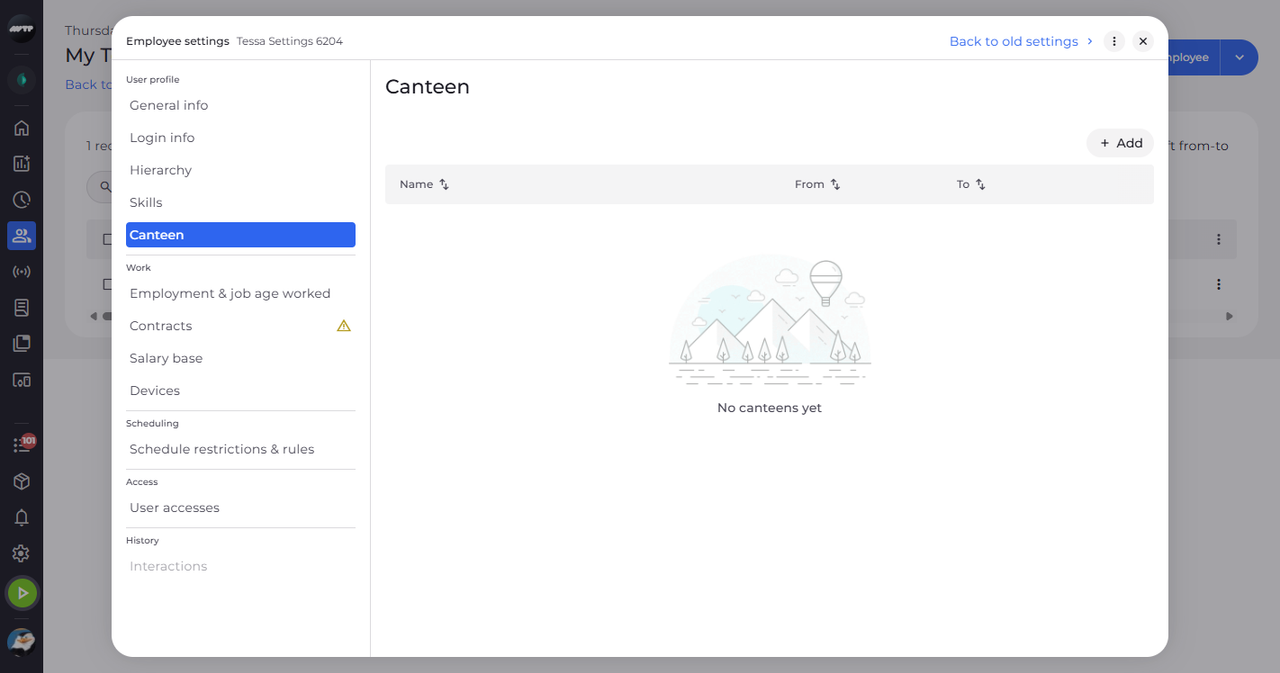
In My Team, click the employee's ⋮ button and choose Edit employee. Then click Canteen on the left. The section lists the employee's canteens with their From and To dates.
-
Step 2: Add a canteen
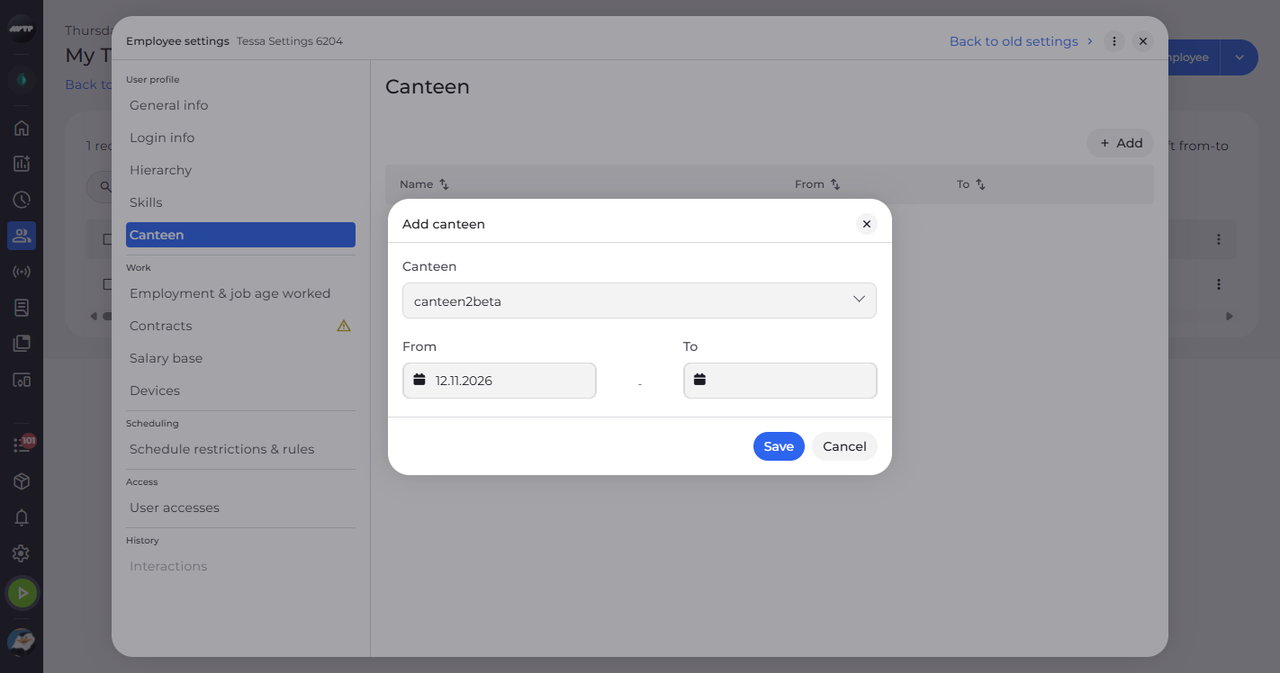
Click Add. In Add canteen, choose the canteen in the Canteen list and check the From date. Set To only if the period has an end.
Tip: Canteen and From are required; From starts at today. Leave To empty when there is no end date.
-
Step 3: Check the saved canteen
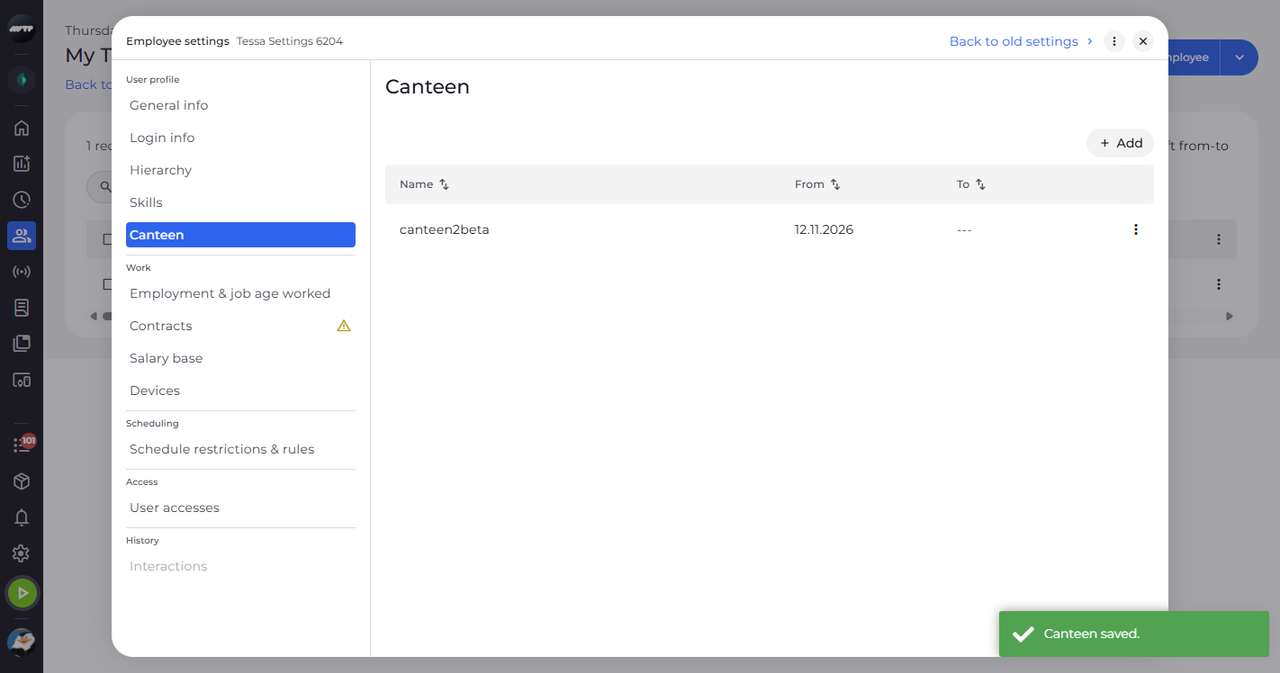
Click Save. The dialog closes, the canteen appears in the list with its dates, and a message confirms "Canteen saved."
Tip: If the save is refused, the dialog stays open and says why.
-
Step 4: Delete a canteen
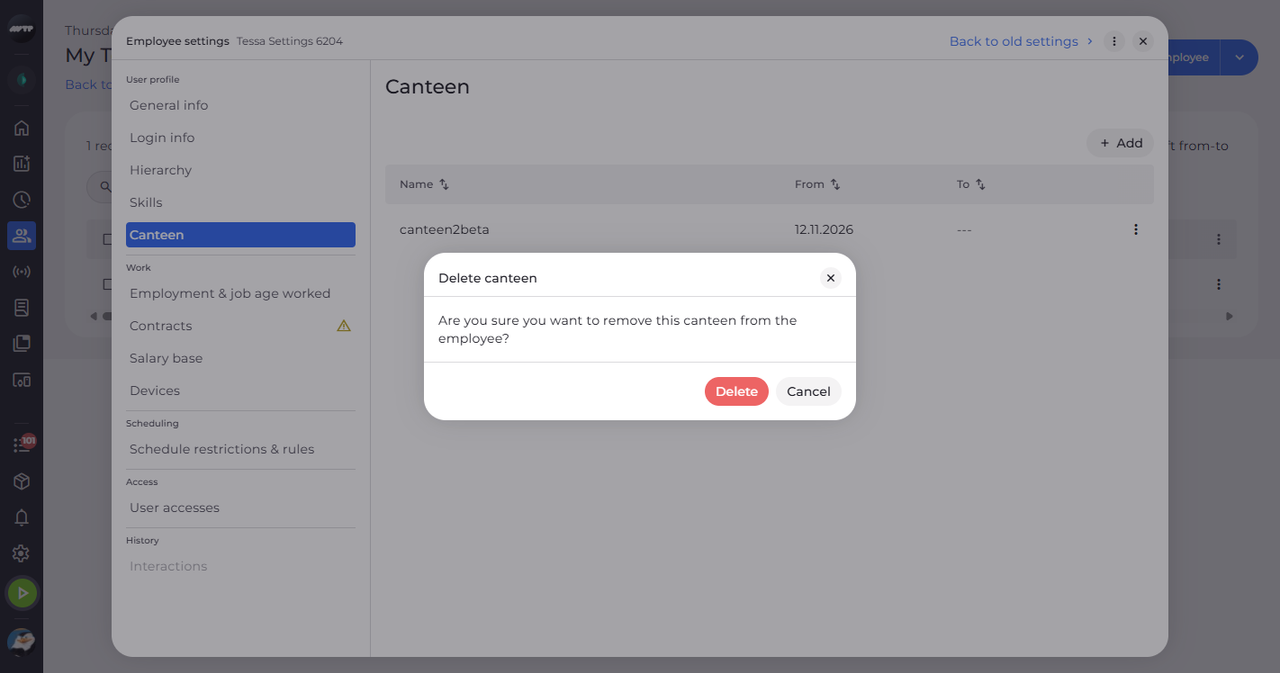
To remove a canteen, click the ⋮ button at the end of its row and choose Delete. Delete canteen asks whether you want to remove the canteen from the employee.
Tip: Confirm with Delete; the settings confirm "Canteen deleted."
What happens next
The employee's canteens are up to date. After Delete, the canteen is gone from the list.
Good to know
- With row ⋮ → Edit you can change only the dates; the canteen itself cannot be changed.
- Periods at the same canteen may be shown as one row after you save.
- With no canteens, the section shows "No canteens yet".
Questions
Why is Save greyed out?
Save stays disabled until you choose a canteen and a From date. If To is before From, the dialog says "The end date cannot be before the start date."